Getting started with DotVVM Business Pack
DotVVM Business Pack is a set of advanced components which can save a lot of time if you are building large line of business applications.
Business Pack ships with ~30 controls you can see in the Business Pack Gallery.
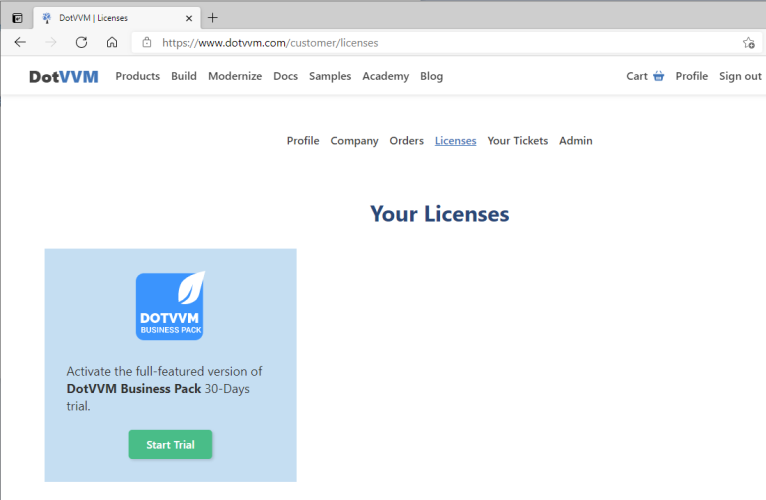
Get 30-days trial
You can try DotVVM Business Pack for 30 days for free.
In the Licenses section, request the trial version.
If you need more time to test the features of DotVVM Business Pack, contact us - we'll be happy to help.
Install Business Pack in the project
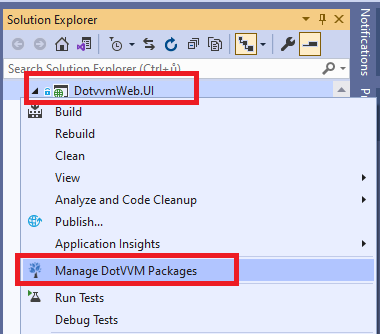
- Right-click on the project in the Solution Explorer window in Visual Studio, and select the Manage DotVVM Packages option:
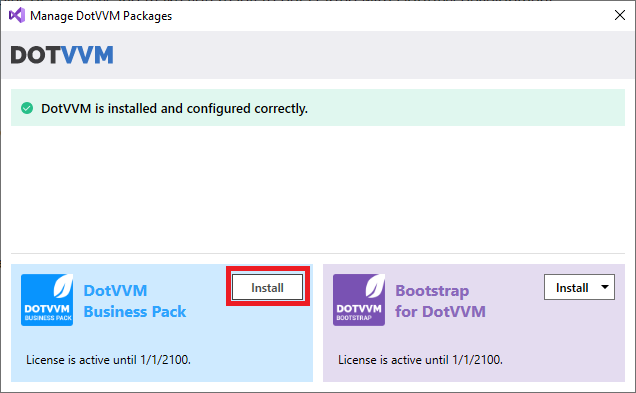
- Click on the Install button in the DotVVM Business Pack section.
If you don't see any controls with the
<bp:prefix in the IntelliSense after the packages are installed, try launching the application - the IntelliSense will refresh the project configuration.
Manual installation
If you don't want to use the wizard, you can install Business Pack manually by taking the following steps:
Make sure you have configured DotVVM Private NuGet Feed.
Install the
DotVVM.BusinessPackpackage in the project.Open the
DotvvmStartup.csfile and add the following line in theConfigureServicemethod:
public void ConfigureServices(IDotvvmServiceCollection options)
{
   options.AddBusinessPack();
   ...
}
This will register all Business Pack controls under the <bp:* tag prefix, and it also registers several Business Pack resources.